
A few weeks ago we talked about using an editorial calendar organizing your blogging schedule. Having a schedule defined is a great first step. The next step is getting ahead of the curve by making sure ti - i - i - ime is on your side. OK, now I know you're going to want to go find that song on YouTube (I did) so here it is: The Rolling Stones - Time Is On My Side.
I tend to post on Monday mornings. I mean, the name of the website is 15 Minute Mondays after all. Of course, some Mondays I'm busier than others. And, I'm sure, sooner or later there will be some kind of emergency situation that takes me out of pocket on a Monday. There are lots of things that can trump posting to your blog on your usual day. However, you can get around that by writing your posts early -- days, weeks, or even months -- and scheduling them to go live on your website whenever you want.
This is normally how I do my work. Some days I'll post live, but most of the time I'm a week or two ahead of schedule. Occasionally while facing a boring Saturday afternoon with the rest of the family out pursuing their own agendas, I might even write four or five blog posts and schedule them to appear on my website at the appropriate date and time.
Below I'll show you just how easy it is to set the publish date and times for your blog posts using either WordPress or Blogger.
Scheduling Posts in WordPress
When writing your blog posts in WordPress, just above the Publish button, you'l see the words "Publish immediately" followed by a link to edit that setting (see images below.) Click the Edit link and the date and time that you want your blog post to appear. When you're done editing the blog, click Publish. Your post won't appear online until that time.
You can even edit the post right up until the publish time. But be sure that you don't set a half written post to publish at a certain time and then forget to finish it. For those half finished works, it's better to save them in draft mode using the Save Draft button that is just an inch or so above the Publish immediately line.

WordPress Scheduling - Click Edit
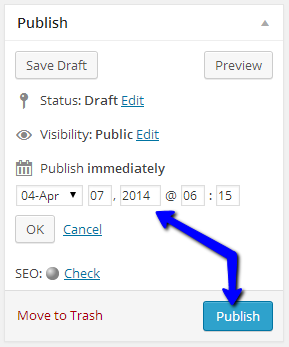
WordPress Scheduling - Set the date and time, then click Publish
Scheduling Posts in Blogger
Similar to WordPress, Blogger has a Schedule option (see images below) on the right hand side of the screen that allows you to set the publish date and time of your blog posts. Simply click on the Schedule bar, select the option to set the date and time instead of the option for automatically publishing (which is the default,) and set your date and time. Then click done.
When you save your Blogger post, it will be scheduled to go live.
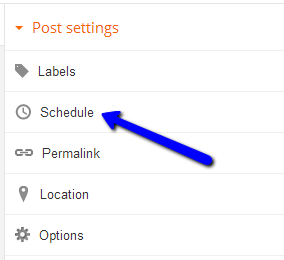
Blogger Scheduling - Click Schedule
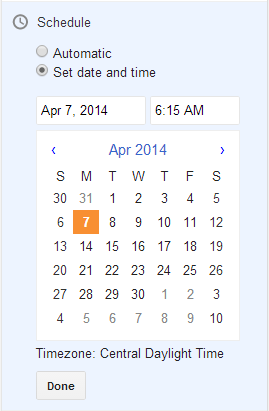
Blogger Scheduling - Select "Set date and time," then select your date and time, and then click done
The Quick Takeaway
Work ahead of schedule, post your blogs to go live when you want them to, and then relax if you hit a bump in the road because your blog will automatically publish your new content right on schedule.